Maya中一键显示摄像机视图

Maya中一键显示摄像机视图
玩过3D MAX的朋友,可能都记得,在MAX中,创建摄像机之后,按C键即可一下子切换到摄像机视图,很是方便。而MAYA中,新建摄像机之后,要切换到摄像机视图,必需在视图菜单中执行Panels | Perspective | camera1,如图。

图 切换到摄像机视图
于是有朋友在抱怨说MAYA不如3D MAX方便了。其实方便不方便只在一线间,我们不应该以表面的“方便不方便”来轻易评判一个软件的好坏,而更要看到底层的东西,如灵活性、稳定性、可定制性、可拓展性等等。下面我们使用MEL来实现MAYA中的一键切换摄像机视图。
因为MAYA中默认c键的功能曲线捕捉,所以我们把切换摄像机的快捷键设为F7。
在脚本编辑器中输入如下MEL,则新建摄像机之后,按F7即可将persp视图切换到摄像机视图了。
///////////////////////////////////////////////////
//created by hmaya at 2006.06
//按F7切换到摄像机视图
//////////////////////////////////////////////////
nameCommand
-ann "The Circle Tool"
-c "lookThroughModelPanel camera1 modelPanel4"
toCameraViewCommand;
hotkey -keyShortcut "F7" -name "toCameraViewCommand";
值得注意的是:该命令只对第一次新建的摄像机(Create | Cameras | Camera)有效,而且摄像机采用MAYA默认的名称camera1,不得修改新建摄像机的名称,否则该快捷键失效。
主要是下面的MEL命令,起到了切换视图的作用,其中camera1为新建摄像机的名称。
lookThroughModelPanel camera1 modelPanel4;

看完不过瘾?点此向作者提问

MEL中神奇的运算符“ + ”

MEL中神奇的运算符“ + ”
MEL中的“+”,不仅可以对数值作“加”运算,而且可以对字符串、数值、变量等作相加运算。
看下面的MEL实例:
int $year = 2006;
string $country = " Germany ";
string $event = "World Cup";
string $champion = "Italy";
print "\n";
print ("The last World Cup is at " + ($year-4) + ".\n");
print ("Here is " + $year + $country + $event + ".\n");
print ("The champion is " + $champion + "!!!\n");
将其输入脚本编辑器,并执行,运行结果如图:

图 运行MEL
在上面的MEL 中的print 命令中,即有字符又有整数,MEL均可以使用“+”将它们连接起来。
再看下面的例子:
string $pre = "T_";
int $n = 7;
string $post = "_00";
string $Name = $pre + $n + $post;
print $Name;
print "\n";
rename trees $Name;
将其输入脚本编辑器执行,运行结果如图,我们使用“+”将字符串、数值混合,并存储在一个变量中了。

图 使用“+”将字符串、数值混合

看完不过瘾?点此向作者提问

readme

本站文章的版权归文章作者所有。如需转载请注明出处,并与作者或者站长联系。
Email: hmaya@163.com

看完不过瘾?点此向作者提问

Maya插件开发入门

Maya插件开发入门
这里笔者给出一个创建简单的MAYA C++插件的流程。
笔者给出MEL和C++插件两个版本,实现了同样的功能。
这个插件的背景是这样的,大多人听说MAYA8.5问世之后,都是欣喜万分,终于可以感受新版本的MAYA了。唯独方老板听到这个消息后,一筹莫展,并怨恨交加。下面的MEL和C++插件都是实现这样的一个想法。
MEL版:
float $maya_version = 8.5;
string $boss = "bossFang";
string $person = "bossFang";
if($maya_version == 8.5 && $person != $boss){
print ("happy : ) Enjoy maya 8.5 \n");
}
if($maya_version == 8.5 && $person == $boss){
print (" : ( Fuck! Fuck! sign,why now? \n");
}
输入脚本编辑器并执行,结果如图。

图 执行MEL
C++ plug-in for maya7.0 版:
在.NET中执行文件 | 新建 | 项目,如图。

图 新建项目
在Visual C++项目中选择MayaPlugInWizard,如图,然后选择文件路径并给定名称,这里笔者使用boss为名。

图 选择MayaPlugInWizard
单击确定后,Maya Plug-in Wizard会自动进入Plug-in setup(插件设置)窗口,如图,选择Maya7.0,即可为Maya7.0创建插件,下面还要选择MAYA的安装路径,并填写作者名称。

图 插件设置
单击左侧的Plug-in Type(插件类型),选择MEL Command,即可创建MEL命令型插件,输入插件名,这里笔者设为boss,将来在命令行输入boss,即可执行该插件了。

图 输入插件名
最后,单击左侧的Included Libraries(包含的库),可以设定该插件包含哪些库文件。对于我们要创建的简单插件来说,默认的库就够了,单击Finish(完成)。

图 选择默认的库
这样,在Maya Plug-in Wizard的指导下,我们成功创建了所需的cpp文件,如图,在doIt函数中插入代码即可。

图 在doIt函数中插入代码
如图,在文件顶部包含所需的maya头文件
#include
#include
并在doIt中加入自定义的代码。

图 添加maya头文件和代码
最后,在.NET中执行生成 | 生成解决方案,即可得到.mll文件了,如图。关于插件的加载和使用,将在下面一招加载和使用插件里介绍。

图 得到.mll文件
下面是该插件所有的代码:
// Copyright (C) lizhihao
// File: bossCmd.cpp
// MEL Command: boss
// Author: Maya Plug-in Wizard 2.0
//
#include
#include
#include
DeclareSimpleCommand( boss, "lizhihao", "7.0");
MStatus boss::doIt( const MArgList& args )
{
MStatus stat = MS::kSuccess;
MString info;
MString boss("BossFang");
MString person("BossFang");
double maya_version = 8.5;
if(maya_version == 8.5 && person == boss){
info = MString(": ( Fuck! Fuck! sign,why now? \n");
}
if(maya_version == 8.5 && person != boss){
info = MString("happy : ) Enjoy maya 8.5 \n");
}
//显示字符串,相当于MEL中的print
MGlobal::displayInfo(info);
setResult( "boss command executed!\n" );
return stat;
}

看完不过瘾?点此向作者提问

在C++ API中嵌入MEL命令

在C++ API中嵌入MEL命令
MAYA的C++ API与MEL之间互为补充。我们可以在C++插件中嵌入MEL命令。MAYA的C++ API提供了MGlobal::executeCommand()接口,并有许多重载的版本,使用这个接口,我们可以轻松的将MEL命令嵌入插件中。
首先我们需要把MEL命令变成MString,再把这个MString填入MGlobal::executeCommand()中即可。下面是两个例子:
例1:
//假设场景中存在名为obj的物体
//duplicate -rr -n theTempObj obj
//上面的MEL语句是复制obj,并将复制得到的物体命名为theTempObj
//定义MString型变量 duplicateCommand
//并将duplicateCommand初始化为MEL命令
MString duplicateCommand("duplicate -rr -n theTempObj obj");
//执行MEL命令
MGlobal::executeCommand(duplicateCommand);
例2:
//float $pos[] =`xform –t –q –ws …`;
//上面MEL语句的作用是将查询到的物体的世界坐标存储到名为$pos的浮点数组中
//下面的C++ API实现了和上面的MEL语句几乎一样的功能。
//定义MString型变量bbCommand
MString bbCommand;
//将MEL语句赋予bbCommand
bbCommand = MString("xform -q -bb -ws ") + theDagPath.fullPathName();
//定义MDoubleArray型变量bbPos,
//相当于double型的数组,类似于MEL中的float $pos[]
MDoubleArray bbPos;
//执行MEL命令,并将结果返回到bbPos中
MGlobal::executeCommand(bbCommand,bbPos);
//下面调用MDoubleArray类的成员函数get()
//将bbPos中的数据存储到普通的double型数组中
double p[]; //定义double型数组
bbPos.get(p);// 将bbPos中的数据存储到数组p中
//调用MDoubleArray类的成员函数length (),获取数组中元素的个数
int count = bbPos.length();
值得注意的是:如果把大段大段的MEL脚本嵌入到C++中,编译执行,会出现什么结果?
这样虽然可以,但笔者不建议这么做!在C++插件中,请尽可能的使用C++ API!
因为C++中嵌入的MEL命令执行速度比直接在MAYA中运行MEL脚本要慢得多!
笔者曾经做过一个测试,执行同样的功能,分别用MEL 和C++ API实现,运行时间如下:
MEL 100~125秒
C++ API 10~14秒
最后笔者完全不使用C++ API,只是把MEL原封不动的嵌入C++,运行时间如下: C++嵌套MEL 6分钟 +
可以看到C++嵌套MEL的运行速度,相比直接使用MEL,慢了不是一点半点。所以建议大家在C++插件中,尽可能的使用C++ API!
当然,使用C++ API可以获得更快的执行时间,但相比MEL来说,C++ API很不直接,因为MAYA的核心被隐藏,不允许改动,也就意味着使用C++ API远比MEL要繁琐。
下面的例子,实现了同样的功能,都是设置时间线的当前时间,但MEL相当简洁和直观,C++ API则很麻烦。
//功能:设置当前时间到第10帧
C++ API
double currentTime = 10;
MTime tm(currentTime, MTime::kFilm);
MAnimControl anim;
anim.setCurrentTime(tm);
MEL
currentTime 10;
C++ Vs MEL
什么时候用MEL?什么时候用C++ API?
MEL与C++ API互为补助,90%的MEL命令,都有对应的C++ API;而部分C++ API具备MEL不能实现的功能或更高的效率。
建议:
1.界面部分使用MEL编写
2.核心尽量使用C++ API
3.不得不用MEL命令时,再使用MEL命令

看完不过瘾?点此向作者提问

安装Maya Plug-in Wizard

安装Maya Plug-in Wizard
在Win32操作系统下,如果要为MAYA7.0/8.0开发插件(Plug-in),必须安装Microsoft Visual Studio .NET 2003。如果大家习惯于VC++6.0,则可以尝试为MAYA4.0开发插件。
找到MAYA的安装目录,在devkit文件夹下找到pluginwizard文件夹,然后找到它内部的MayaPluginWizard2.0.zip文件。该文件的路径一般是:
C:\Program Files\Alias\Maya8.0\devkit\pluginwizard
Maya Plug-in Wizard的安装步骤如下:
① 将MayaPluginWizard2.0.zip文件解压缩,如图,得到如下文件。

图 解压缩MayaPluginWizard2.0.zip
②. 将下面的文件
MayaPlugInWizard.vsdir
MayaPlugInWizard.vsz
MayaPlugInWizard.ico
拷贝到如下路径:
"C:\Program Files\Microsoft Visual Studio .NET 2003\Vc7\vcprojects"
③. 然后将文件夹
MayaPlugInWizard
拷贝到如下路径
"C:\Program Files\Microsoft Visual Studio .NET 2003\Vc7\VCWizards"
这样我们就成功安装了Maya Plug-in Wizard。
今后当我们启动Visual Studio .NET 2003,创建Visual C++项目时,就可以看到新增了一个MayaPlugInWizard图标,选择它,即可创建MAYA插件,如图。

图 .NET2003下的MayaPlugInWizard图标

看完不过瘾?点此向作者提问

用表达式制作点阵Shader【第一季】

用表达式制作点阵Shader【第一季】
众所周知,MAYA的材质系统三头六臂,功能非常灵活和强大。
这里我配合place2dTexture节点,使用表达式创建一个圆点阵列的Shader。
如图1 在Hypershade中创建一个Lambert材质节点(或其他类型如Blinn),一个place2dTexture节点。

如图2 按住Ctrl,双击节点,为节点重命名。把place2dTexture1节点命名为pl2d,lambert2名称可以不变,如果你想重命名 lambert2,则记得把表达式中使用lambert2的地方替换为你自己的名称。同时注意名称的大小写,因为后面的表达式中要使用名称,而不论MEL 还是表达式(Expression),对字母的大小写都很敏感。

如图3,执行Window | Animation Editor | Expression Editor(窗口 | 动画编辑器 | 表达式编辑器)。

如图4,在Expression Editor(表达式编辑器)中输入表达式(表达式的代码将在后面给出),单击Create即可。

如图5,加入表达式后,材质球已经发生了变化。

如图6,展开材质的上下游节点,可以看到,表达式节点把lambert2和place2dTexture节点连接了起来,

如图7,此时我们可以编辑lambert2,改变它的颜色(Color),并给一定的辉光(Glow Intensity)

如图8,将lambert2赋予场景中的物体,渲染,可以看到圆点阵列效果了。

//表达式代码
float $v= pl2d.outV*150;
float $u= pl2d.outU*150;
int $weight;
float $circle = ($v%5 – 2.5)*($v%5 – 2.5) + ($u%5 – 2.5)*($u%5 – 2.5);
if($circle < 2){ $weight = 1; } else{ $weight = 0; } if($weight == 0 ){ //$u = 0; //$v = 0; lambert2.transparencyR = 1; lambert2.transparencyG = 1; lambert2.transparencyB = 1; } else{ lambert2.transparencyR = 0; lambert2.transparencyG = 0; lambert2.transparencyB = 0; } 这里主要使用了place2dTexture节点的outU和outV属性,使用下面的公式来定义了圆形区域: (U-U0)*(U-U0) + (V-V0)*( V-V0) < R*R 并定义了一个整型的$weight权重变量,圆形内部设$weight为1,圆形外部设$weight为0。最后根据$weight来决定lambert2的透明度(transparency)。 明白了以上表达式的工作原理,我们表达式稍加改进,即可得到圆洞镂空效果。方法很简单,把原来透明的地方变为不透明,原来不透明的地方变为透明。代码如下: float $v= pl2d.outV*150; float $u= pl2d.outU*150; int $weight; float $circle = ($v%5 - 2.5)*($v%5 - 2.5) + ($u%5 - 2.5)*($u%5 - 2.5); if($circle < 2){ $weight = 1; } else{ $weight = 0; } // if($weight == 0 ){ 为圆点阵列Shader if($weight == 1 ){ //$u = 0; //$v = 0; lambert2.transparencyR = 1; lambert2.transparencyG = 1; lambert2.transparencyB = 1; } else{ lambert2.transparencyR = 0; lambert2.transparencyG = 0; lambert2.transparencyB = 0; } 结果如图9.
当然这里例子有些简单,你可以说 使用PS搞一张圆饼的贴图 + RepeatUV 一样可以实现,
更简单的,使用Ramp的Circular Ramp + RepeatUV也可以实现。
不过可以肯定的是,有了place 2DTexture的outU和outV,你几乎可以定义任意自己喜欢的程序纹理,写个五角星, 砖块,大理石,木纹什么的,都不在话下,我上面是把输出连到Transparency上了,你也可以连接到Color,Bump等。方法就这样,能写出什么样的纹理就看个人的图形学积累了。
在【用表达式写Shader第二季】里,笔者会介绍更多的表达式Shader。
http://www.cg-discovery.com/article.asp?id=8

看完不过瘾?点此向作者提问

Facial Expression Clone

Expression Clone — Technique and Implementation
by hmaya 2007.5.22 {hmaya@163.com}

Key Word:Facial Expression, Maya® Plug-in, RBF NN, Morphing, Cloning
There are many ways to make facial expression, such as extracting expression data from video or image, manually creating and adjusting expression, or creating expression by instrument of expression capture. But the main problem of these methods is that people usually have to create one expression library for each character. And the animation data could not be shared and reused by other characters.
Expression cloning is a technique which reuses existing data, and transfer expression data between different models, this technique could greatly enhance the efficiency of producing facial expression.
After reading a lot of papers and books on Morphing and Facial Expression, a method of Expression Cloning was proposed by Jun-yong Noh and Ulrich Neumann. Because PNAI is based on Maya®, and Maya® is so popular in the field of 3D animation, the thesis aims to improve and extend existing algorithms of expression cloning, and to develop a plug-in based on Maya® C++ API.
With the knowledge of Artificial Intelligence, Computer Graphics and Maya® software kit, and RBF, I implemented an algorithm of expression cloning and a Maya® plug-in. Combined the Blend Shape technology of Maya®, I extended and pushed the application of this algorithm. The plug-in can not only clone but also rebuild and combine expression. After rebuilding and combining, we could generate an expression at the target model which has a different order from the original expression of the source model. Moreover, we could modify the degree of animation by Blend Shape. These offer more freedom and more choices for users, so the plug-in can be well used by more artists, and will be more popular in field.
To implement an algorithm of expression cloning and create a Maya® plug-in, there are 2 main challenges to me.
■ 1. How to transfer the expression data of source model to target model? There are many differences between source model and target model, such as different count of vertices, different size of model, different topology and structure, different direction and range of muscle movement, etc.
One method is computing the motion vector of every vertex, then adjust motion vector and apply it to vertices in target model. With motion vectors, we could compute the new position of every vertex in target model, and they will have similar movement with source model, so target model will have similar expression with source model.
To adjust motion vectors, we have to morphed source model to target model, then we could build a transform matrix for every vertex in source model, and these transform matrix could be used to adjust motion vectors which will be applied to target model. Some details are listed as follow:
Firstly, I morphed source model to target model with the powerful ability of interpolation and classification by Radial Basis Functions Neural Networks (RBF NN). To get the samples and target data which trained by RBF NN, we have to mark some corresponding vertices at source model and target model. For example, there is a vertex (called P) at the top of nose in source model, and there is a vertex (called P’) at the top of nose in target model, P and P’ are a pair of corresponding vertex. And the coordinate of P will be inputted to RBF NN as samples, the coordinate of P’ will be inputted to RBF NN as target data. After many training based on samples and target data, RBF NN become a stable networks, and we get one group values of weight. With these weights, we could compute the new position of every vertex at source model, and morph source model to target model.
Secondly, we could build transform matrix after morphing source model to target model. We build the transform matrix based on local space and world space. By multiplying original motion vector with transform matrix, we get new motion vectors. Another problem is the different count of vertices between source model and target model, and new motion vectors couldn’t be applied to target vertices. Out solution is blending motion vectors with barycentric coordinates. To use barycentric coordinates, the faces of source polygon model must be triangle. Even though there are quadrate or other polygons in source model, after a process which could be called “Triangulate”, every face in source polygon model will become triangle.
Finally, record the positions of target model vertices at different time by keyframe, and we could get similar movement as source model.
It is motioned that we have to mark some corresponding vertices at source model and target model. How to mark corresponding vertices? It’s the second main challenge to me.
■ 2. How to mark corresponding vertices? Every vertex in Maya® will have an index ID, such as “pCylinder1.vtx[34]”. We could distinguish vertices by index ID, but it’s hard to operate if we have many vertices to mark.
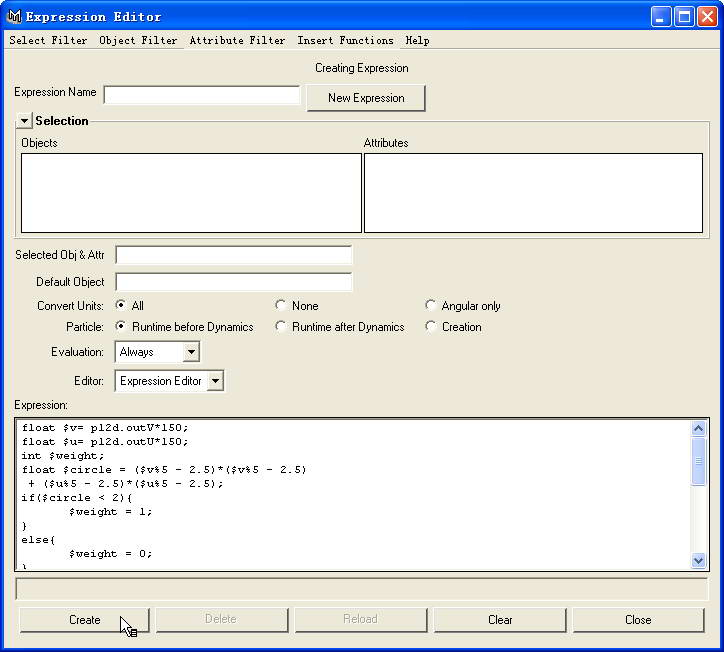
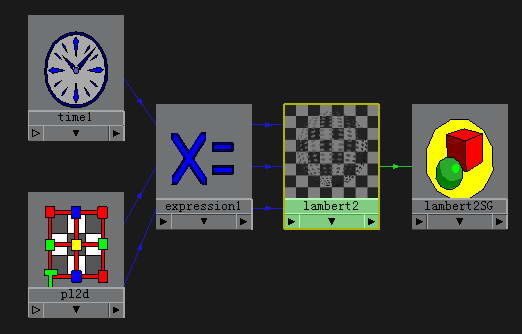
My method is set blind data! Blind data is a type of info which could be added to vertex or face, and blind data could be identified by other software such as game engine.
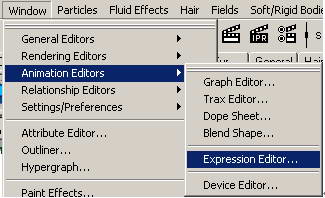
Blind data in Maya® could be set and queried. I have written a MEL script to show a windows UI in Maya®, then every one could easily set blind data for selected vertices. Moreover, Maya® supplied a C++ API which called “getDoubleBlindData()” in MFnMesh class, we could query blind data of any vertex through this API.
If we set different blind data for different vertex, we could easily identify vertices by querying their blind data. With help of my MEL script, it’s easy to mark corresponding vertices.
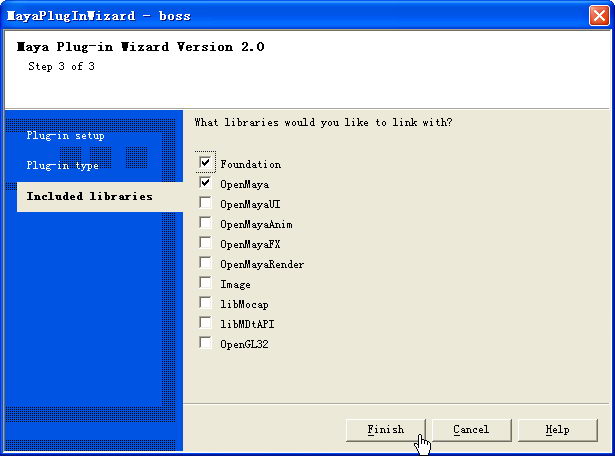
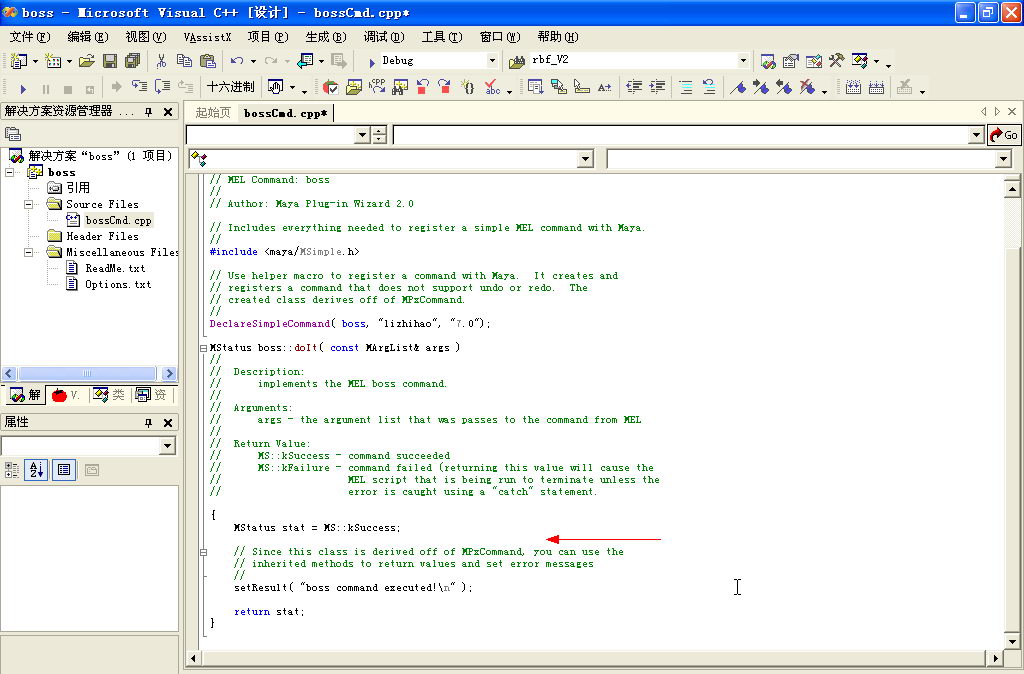
After solved the two main problems, I developed a plug-in based on Maya® C++ API.
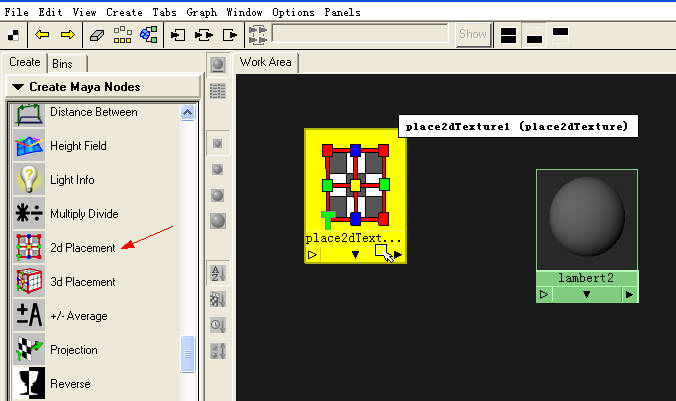
There is a technology in Maya® which is called “Blend Shape”. Blend Shape could be well applied to my plug-in.
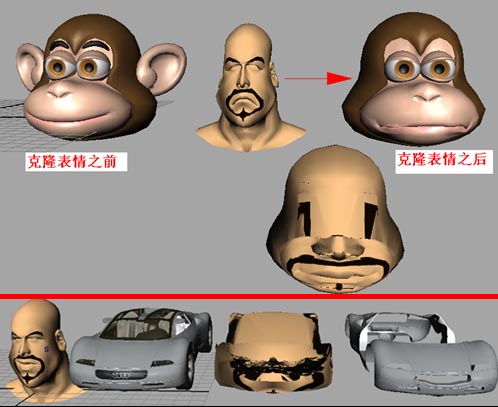
With my expression cloning plug-in, I could transfer expression data from source model to target model frame by frame. If we clone a frame sequence, we could get expression animation; If we clone only one frame, we could get an expression pose. Suppose we have a source model, and there is facial animation info in it. Certainly, we could transfer its facial animation to target model by cloning a frame sequence. More important, we could extract several useful expressions, and transfer it to target model by specifying several frames. Then we could get several useful expression poses.
If we got several useful expression poses, it’s easy to create new facial animation with the Blend Shape technology! It’s mean that we could not only clone expression, but also rebuild expression. Combined the Blend Shape technology of Maya®, we could get new facial Sequence! For example, if a facial sequence of source model is “standard -> amazed -> envious -> sad”, with my plug-in and blend shape technology of Maya®, we could rebuild new facial animation on target model, for example, we could get a facial sequence “envious -> standard -> amazed -> sad”. And this extended the application of expression cloning technique, offered more freedom and more choices for users.
What’s more, with the aid of Blend Shape, we could also modify the degree of facial animation. For example, there is an obvious smile in source model. We could transfer the smile expression to target model, and adjust the degree of smile, finally, we could get a light smile in target model.
This plug-in could greatly enhance the efficiency of producing facial expression, especially there are many characters in one film, and each one must have facial animation. We only need to create facial animation for just one character, and clone it to other characters.
Because these features of this plug-in, I’ve pushed the application of existed algorithm, and it’s convenient and easy to use. So the plug-in can be well used by more artists, and will be more popular in animation field.
表情克隆技术及实现
关键字:表情动画、Maya®插件、RBF神经网络、变形、克隆
现有的表情动画制作方法有很多,但大多是为每个角色单独创建一套表情库,表情动画数据被单个角色拥有,已有的动画数据无法在角色之间重用。如果可以重用已有动画数据,将一个角色的表情动画数据传递到一个新的角色上,即表情克隆,则可以实现动画数据的重用,大大降低动画师的工作量,简化表情动画的制作流程,提高生产力。
在查阅和对比了许多已有的Morphing技术和表情动画方面的文献之后, Jun-yong Noh和Ulrich Neumann提出的表情克隆算法能够较好的实现动画数据的重用,而且可以较好的运用到PNAI上。鉴于该试验平台是搭建在Maya®之上,而且Maya®在动画业界有着相当的用户群,所以本文致力于改进和拓展该算法的应用,并基于Maya® C++ API开发表情克隆插件。
基于人工智能、计算机图形学、Maya®软件包三大领域知识,在弄清楚关联点的标记、RBF变形、变换矩阵的构造、运动向量的传递等一系列核心技术后,本文用Maya®插件的形式实现了Jun-yong Noh和Ulrich Neumann的算法,并结合Maya®的Blend Shape技术,向前大大推进和拓展了该算法的应用。目前,该插件不仅可以克隆表情动画,重用现有动画数据,生成和源动画一样顺序的目标表情动画;还可以从源动画数据中抽取有用的部分,进行重构和组合,生成任意顺序的目标表情动画。同时,结合Blend Shape,还可以调整某个表情的程度,如将狂笑调整成微笑。这些开拓性的工作为用户提供了更多的选择和自由,扩展了该表情克隆技术的应用,使得该技术可以更好的被业界接受和运用,为更多的艺术家服务。
我的联系方式: 【hmaya@163.com】
看到很多地方需要收费才能下载我的论文,我决定把我的论文放在这里公开供大家免费下载. 既然是论文,就是要共享,供后人参考和研究使用.<商业用途者除外,如有特别使用,请联系本人, hmaya@163.com>
点击下载此文件

看完不过瘾?点此向作者提问

Maya表达式写Shader【第二季】

更多基础操作见 Maya表达式写Shader【第一季】 : http://www.cg-discovery.com/article.asp?id=10
Step1.在Hypershade中创建一个Lambert材质节点(或其他类型如Blinn),一个place2dTexture节点。
Step2.按住Ctrl,双击节点,为节点重命名。把place2dTexture1节点命名为pl2d,lambert2名称可以不变,如果你想重命名lambert2,则记得把表达式中使用lambert2的地方替换为你自己的名称。同时注意名称的大小写,因为后面的表达式中要使用名称,而不论MEL还是表达式(Expression),对字母的大小写都很敏感。
Step3.执行Window | Animation Editor | Expression Editor(窗口 | 动画编辑器 | 表达式编辑器)。
Step4.在Expression Editor(表达式编辑器)中输入表达式(表达式的代码将在后面给出),单击Create即可。(代码如下)
Step5.此时我们可以编辑lambert2,改变它的颜色(Color),将lambert2赋予场景中的物体,渲染,可以看到表达式Shader效果了。
//expression
float $v= pl2d.outV*150;
float $u= pl2d.outU*150;
float $weight;
float $A_block = ($v%10)*($v%10) + ($u%10)*($u%10);
float $B_block = ($v%10)*($v%10) + ($u%10 – 10)*($u%10 – 10);
float $C_block = ($v%10 – 5)*($v%10 – 5) + ($u%10 – 5)*($u%10 – 5);
if($A_block > 25 && $B_block > 25 && $C_block < 25){ $weight = 0; } else{ $weight = 0.1; } lambert2.transparencyR = $weight; lambert2.transparencyG = $weight; lambert2.transparencyB = $weight; 原理图:
结果:

原理:

你可以设置$repeatUV,重复纹理次数
你可以设置$n_star,得到n角星
如果用到时,而你又不想在ps里画贴图或者有锯齿问题,那你可以选择我写的这个工具:)
/////////////////////n_star OK///////////////////////////////
//created by hmaya at 2007.8.27
//texture
/////////////////////n_star OK///////////////////////////////
int $repeatUV = 15;
int $n_star = 5;
float $V= pl2d.outV*10*$repeatUV;
float $U= pl2d.outU*10*$repeatUV;
float $u = $U%10;
float $v = $V%10;
float $R = 5;
float $r = 2;
float $alpha = deg_to_rad(180/$n_star);
float $beta = atan($r*sin($alpha)/($R-$r*cos($alpha)));
float $Rm = $r*sin($alpha)/sin($beta);
int $weight;
int $weights[];
int $sum = 0;
int $i;
for($i=0;$i<$n_star;$i++){ float $theta_Rc = deg_to_rad(45 + $i*360/$n_star); float $Rc_x = $R*cos($theta_Rc) + 5; float $Rc_y = $R*sin($theta_Rc) + 5; vector $RO = <<5-$Rc_x, 5-$Rc_y, 0>>;
vector $RP = <<$u-$Rc_x,$v-$Rc_y,0>>;
vector $P_v = <<$u-5,$v-5,0>>;
vector $R_v = <<$Rc_x-5,$Rc_y-5,0>>;
//if( mag($RP)< $Rm && angle($RO,$RP)<$beta || mag($P_v)< $r && angle($P_v,$R_v)<$alpha) if( mag($RP)< $Rm && angle($RO,$RP)<$beta || mag($P_v)< $r) {$weights[$i] = 1;} else {$weights[$i] = 0;} $sum += $weights[$i]; } if($sum >0){
$weight = 0;
}
else{
$weight = 1;
}
lambert2.transparencyR = $weight;
lambert2.transparencyG = $weight;
lambert2.transparencyB = $weight;

下面这个是真正的shader。你需要再创一个名之为lambert3的材质,你可以为lambert3添加贴图或者其他属性,反正我只用了lambert3的outColor,其他下游的东西你可以任意编辑。
//V = 0.3* RR + 0.59* GG + 0.11* BB
这个公式是从RGB中得到亮度
因为是自己写的纹理,所以纹理单元的半径是可以控制的,
使用从lambert3得来亮度信息控制纹理半径,对了,亮的地方半径小,暗的地方半径大,于是。。。
///////////////shader//////////////////
//created by hmaya at 2007.8.31
// shader
///////////////////////////////////////
int $n_star = 6;
float $Luminance = 0.3*lambert3.outColorR + 0.59*lambert3.outColorG + 0.11*lambert3.outColorB;
int $repeatUV = 80;
float $R = 4*( 1-$Luminance) + .2;
float $V= pl2d.outV*10*$repeatUV;
float $U= pl2d.outU*10*$repeatUV;
float $u = $U%10;
float $v = $V%10;
float $alpha = deg_to_rad(180/$n_star);
float $Rm = $R*cos($alpha);
int $weight;
int $weights[];
int $sum = 0;
int $i;
for($i=0;$i<$n_star;$i++){ float $theta_Rc = deg_to_rad(0 + $i*360/$n_star); float $Rc_x = 5 + $Rm*cos($theta_Rc); float $Rc_y = 5 + $Rm*sin($theta_Rc); vector $OP= <<$u-5,$v-5,0>>;
vector $OR = <<$Rc_x-5,$Rc_y-5,0>>;
if( mag($OP)*cos(angle($OP,$OR)) < $Rm && mag($OP)< $R && angle($OP,$OR)<$alpha) {$weights[$i] = 1;} else {$weights[$i] = 0;} $sum += $weights[$i]; } if($sum >0){
$weight = 0;
}
else{
$weight = 1;
}
lambert2.colorR = $weight;
lambert2.colorG = $weight;
lambert2.colorB = $weight;

看完不过瘾?点此向作者提问

Maya Expression | MEL | C++ Plug-in

表达式(Expression)、脚本(MEL Script)、插件(Plug-in)
MAYA中的表达式(Expression)、脚本(MEL Script)、插件(Plug-in)三者究竟有着怎样的关系呢?下面笔者简要的概述一下。
MAYA Expression(表达式),是执行Window | Animation Editors | Expression Editor,在表达式编辑器中输入相应的表达式语句,从而控制物体的运动、旋转、可见性、材质等属性,如图。

MAYA Expression有如下特点:
1.含有全局变量:time、frame
2.语法规则与MEL一致
3.一般表达式是全局有效,在任意时刻都起作用,除非对time添加条件判断
4.解释执行,速度不快,尤其物体很多的情况下。
5.物体的名称与表达式关系密切,修改物体名称后,表达式会失效。
MEL Script(脚本),是在Script Editor(脚本编辑器)中输入一段MEL代码,执行,从而控制物体的造型、动画、材质等属性,如图。

MEL Script有如下特点:
1.解释执行,速度不快
2.依赖于MAYA提供的MEL命令集
3.可以使用proc定义函数,封装一个或多个MEL命令,实现特定的功能
4. “可以返回一条语句的执行结果
5.类C语言,支持过程,不支持面向对象,对海量代码支持的不好,1000行以下?
MAYA C++ Plug-in(MAYA插件),是基于VC.net和MAYA API,编译后得到的.mll文件,如图,即C++插件。.mll文件类似Windows的.dll文件(动态链接库)。

MAYA C++ Plug-in有如下特点
1.C++插件是编译过的二进制文件,无需解释执行,速度快
2. 可嵌入MEL命令
3.MEL完全开源,而C++插件是二进制的,可以保护产权
4 .net环境下,具备开发大型插件的能力,例如上万行的代码的维护。
5.可以面向对象编程

看完不过瘾?点此向作者提问